Name your portal, add your logo, choose the pages in its menu and check its address, then open it for your customers.
4 min readUpdated 5 days ago
Before you start. Every project gets a portal on every plan, and it's live from the start at app.rectify.so/ followed by your portal address. Owners, Admins and Members can change and save its settings.
Your portal is the public site where customers post requests, vote, follow your roadmap and read your changelog. It can also hold your status page and Help Center.
Open the portal settings
1.
In the sidebar, open Publish, then Portal.
The preview on the left shows your portal as visitors see it, including changes you haven't saved yet. Pick a page to preview above it, and switch between Desktop and Phone.
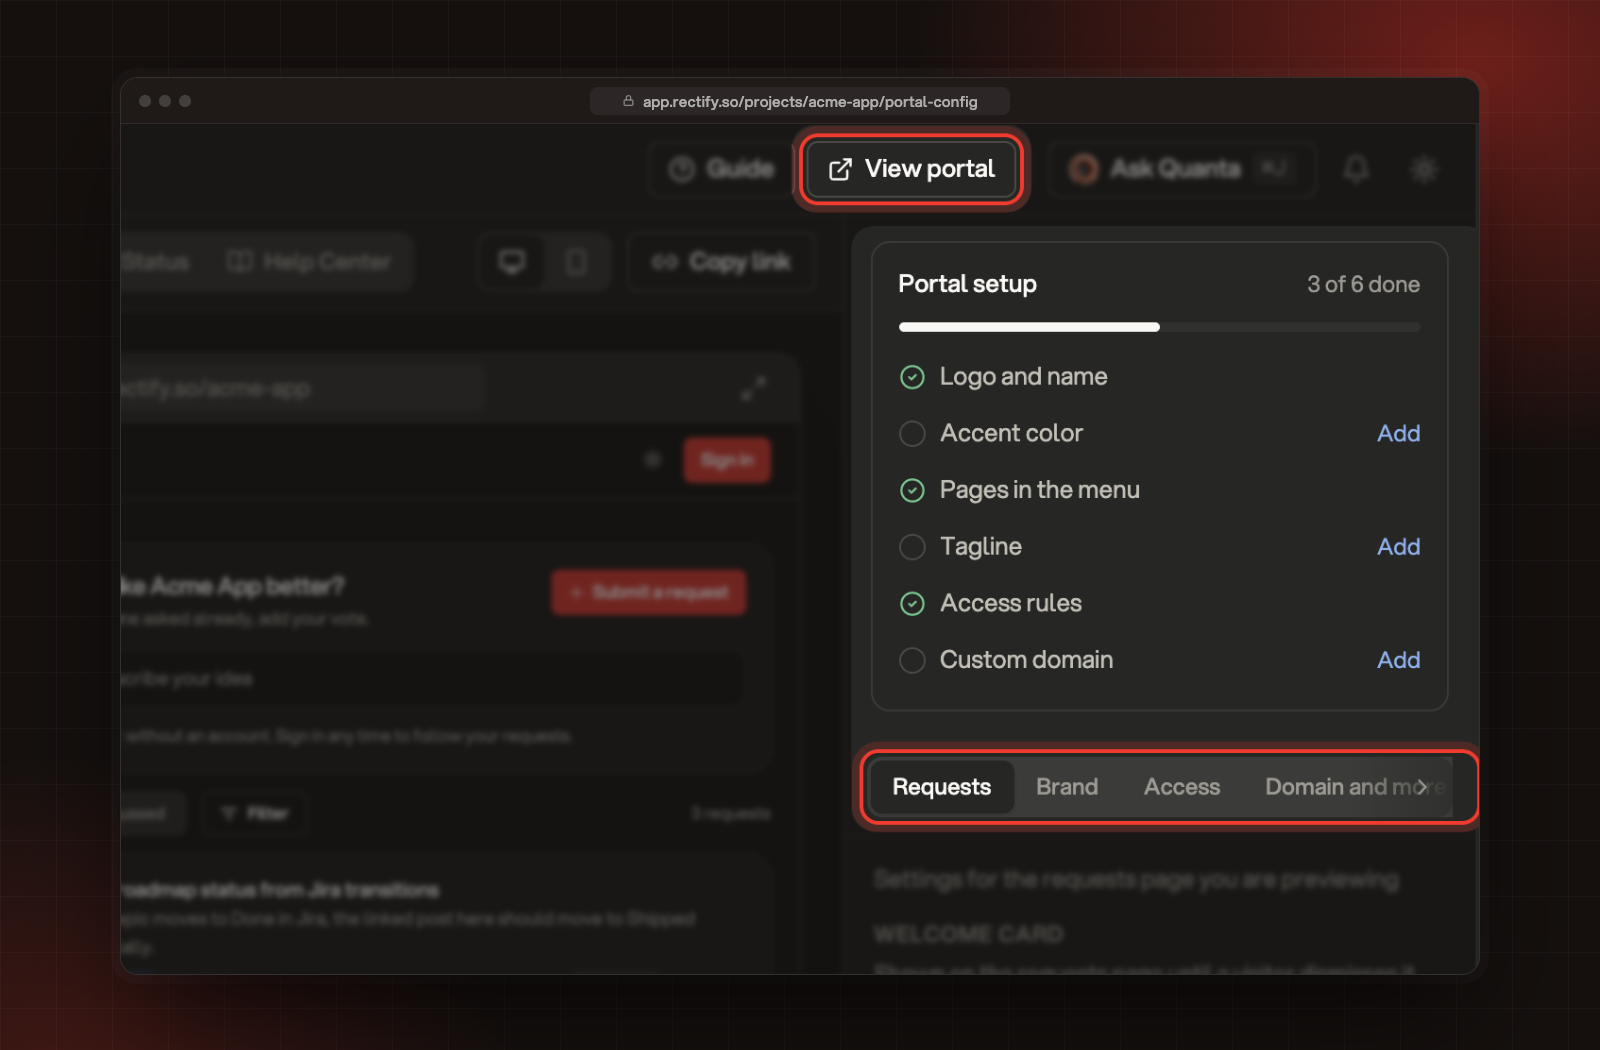
The Portal setup card on the right lists six things to finish: Logo and name, Accent color, Pages in the menu, Tagline, Access rules and Custom domain. Select Add next to one to jump to it. The tabs below the card hold the settings: the first is named after the page you're previewing, then Brand, Access and Domain and more.
The Portal setup card, the settings tabs and View portal.
Name it and add your logo
1.
In the sidebar, open Publish, then Portal.
2.
Open the Brand tab.
3.
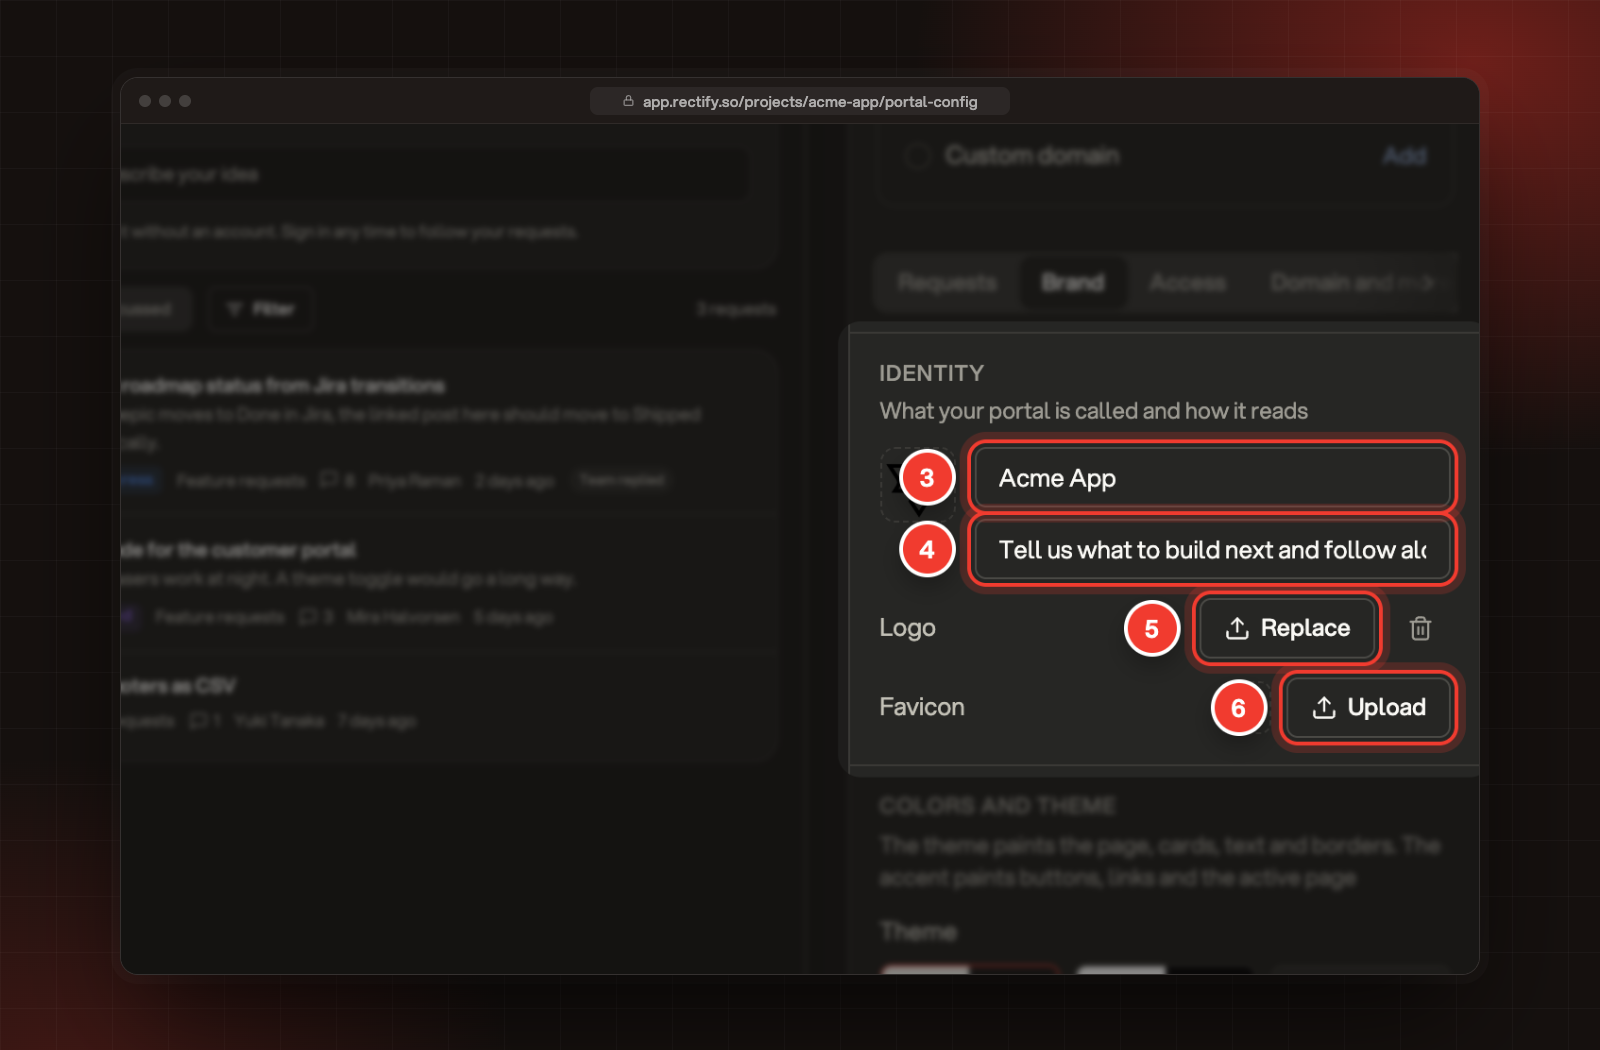
Under Identity, enter your portal's name. It shows in the header and the browser tab.
4.
Add a tagline below it. It's one line under the title on the requests page.
5.
Next to Logo, select Upload to add your logo, or Replace to change it. Square works best.
6.
Next to Favicon, select Upload to add the small icon for the browser tab. Use a square image of 32 pixels or more.
3 Name. 4 Tagline. 5 Logo. 6 Favicon.
Names can be up to 120 characters and taglines up to 200. Images must be under 5 MB, and they upload when you save. If your project has its own logo, Use project logo puts it back.
Choose the pages in the menu
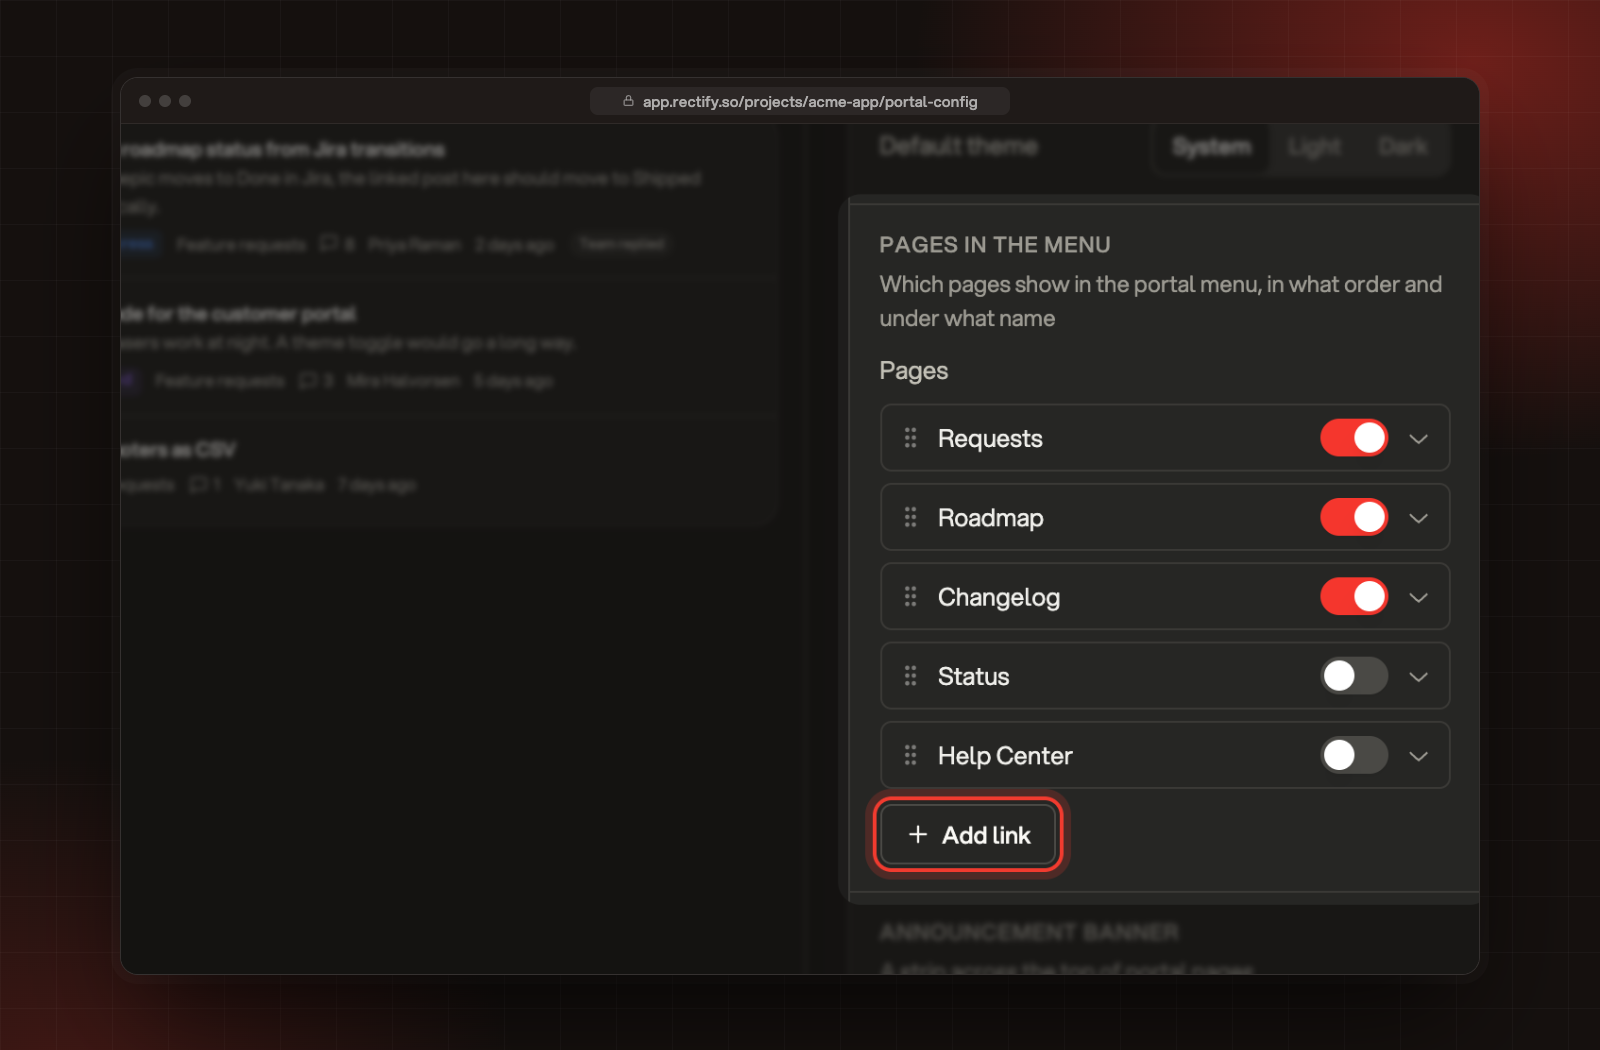
Further down the Brand tab, Pages in the menu lists the portal's pages: Requests, Roadmap, Changelog, Status and Help Center.
•
Use the switch on a page to show or hide it in the menu. Requests, Roadmap and Changelog start switched on.
•
Drag a page to change the order.
•
Open a page with its arrow to give it another name.
•
Select Add link to add a link to your own site, such as your pricing page. Links can open in a new tab.
Pages in the menu, with Add link.
A page you switch off is only hidden from the menu. Anyone with its link can still open it. The Status page is the exception: it only opens while it's switched on.
Check your portal address
1.
Open the Domain and more tab.
2.
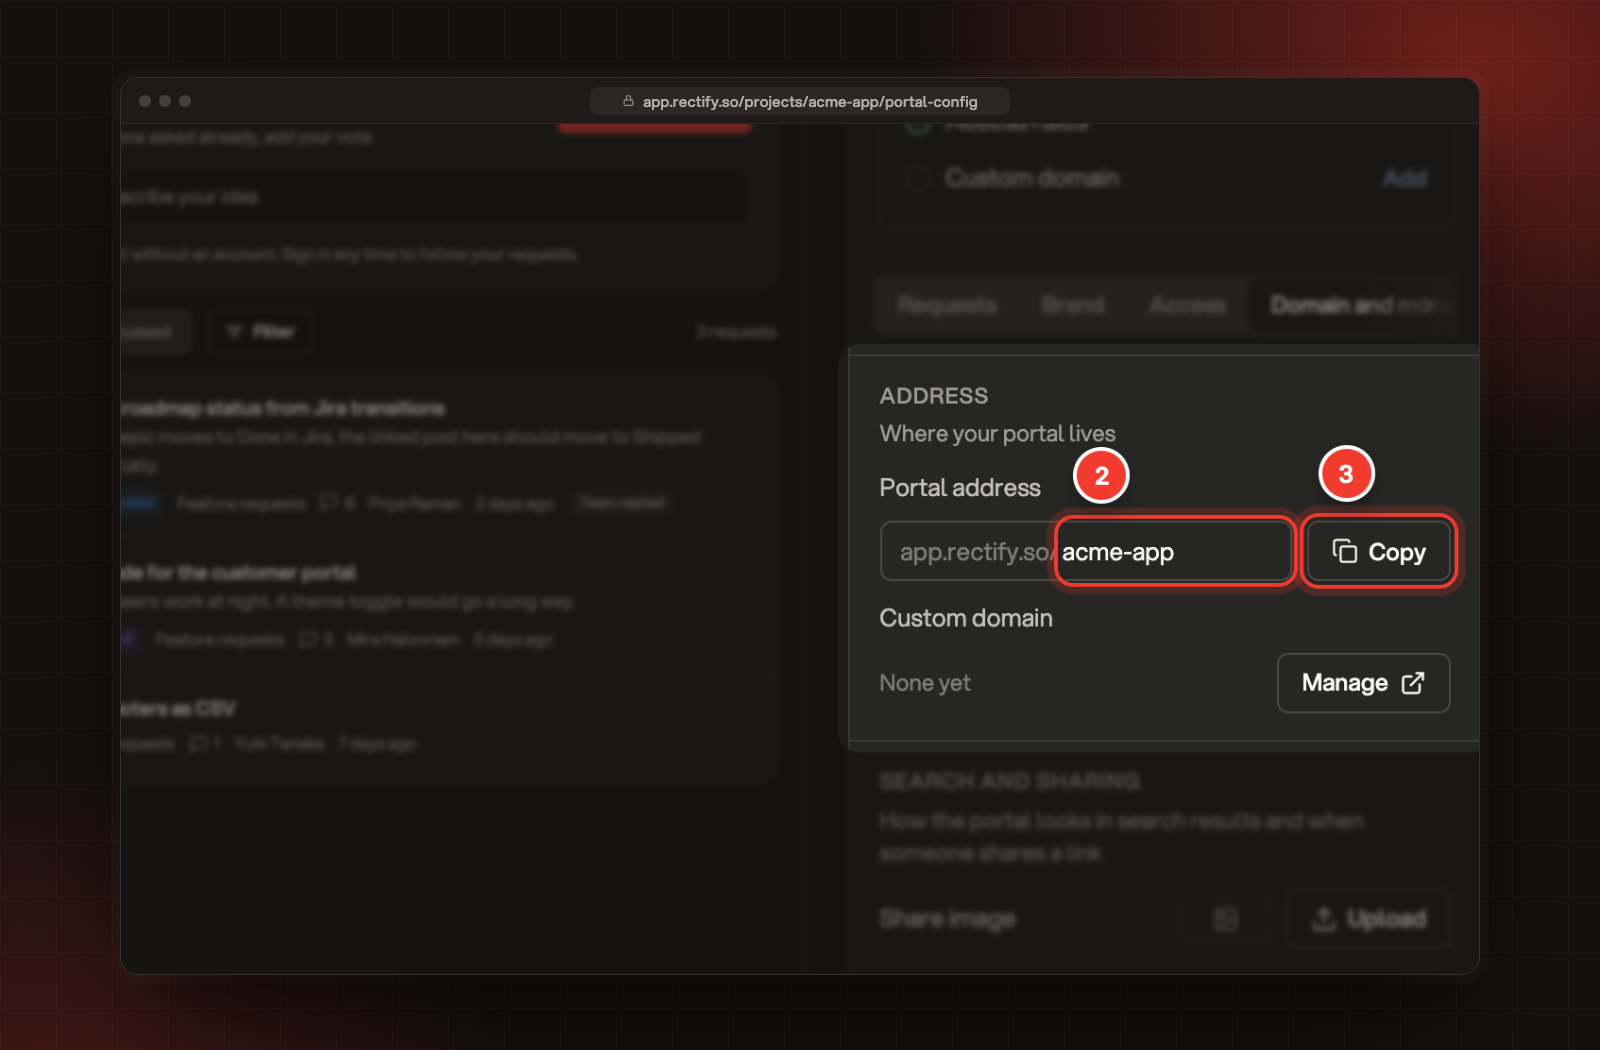
Under Address, check the Portal address. Change it if you like, using letters, numbers and single dashes, from 2 to 80 characters.
3.
Select Copy to copy the full link.
2 Portal address. 3 Copy.
Changing the address changes every link to your portal, including links in emails you've already sent. Links with the old address may stop working.
Want the portal on your own domain, such as feedback.yourcompany.com? See Use your own domain.
Save your changes
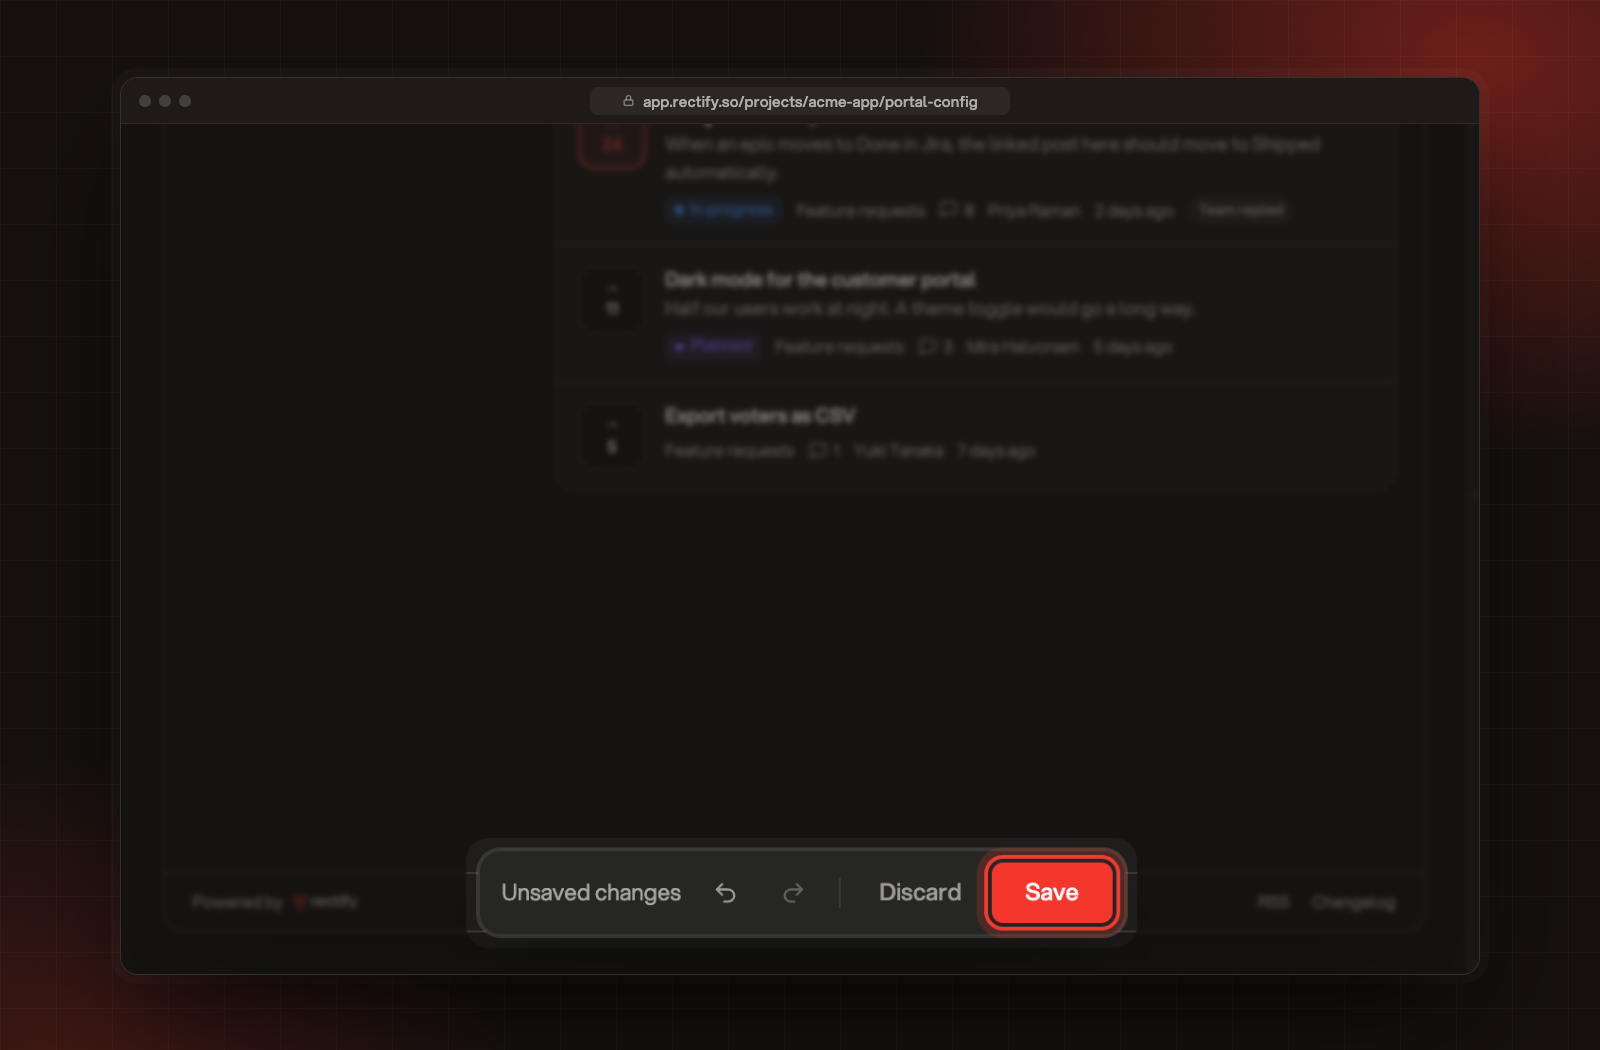
When you change something, a bar appears at the bottom with Unsaved changes. Select Save to publish your changes to the portal, or Discard to drop them. The arrows in the bar undo and redo your last changes.
Unsaved changes, Discard and Save.
If you try to leave the page before saving, Rectify asks Leave without saving?. Select Keep editing to go back and save.
Check it worked
After "Portal settings saved" appears, select View portal at the top of the page. Your portal opens in a new tab with your name, logo and menu. Copy link above the preview copies the link to the page you're previewing.
It says "That portal address is already taken"
Another portal already uses that address. Try a different one, for example with your company's name in it.
It says "Pick an image under 5 MB"
Make the image smaller or save it as a JPG, then upload it again.