Install the Rectify widget on your site

Add one script to your site to turn on the widget, analytics and contacts.

6 min readUpdated 24 days ago
Before you start. You need access to your site's code, or to the custom code settings of your site builder.
One script powers the widget, analytics and contacts. It loads after your page, so it doesn't slow your site down.
Add the script
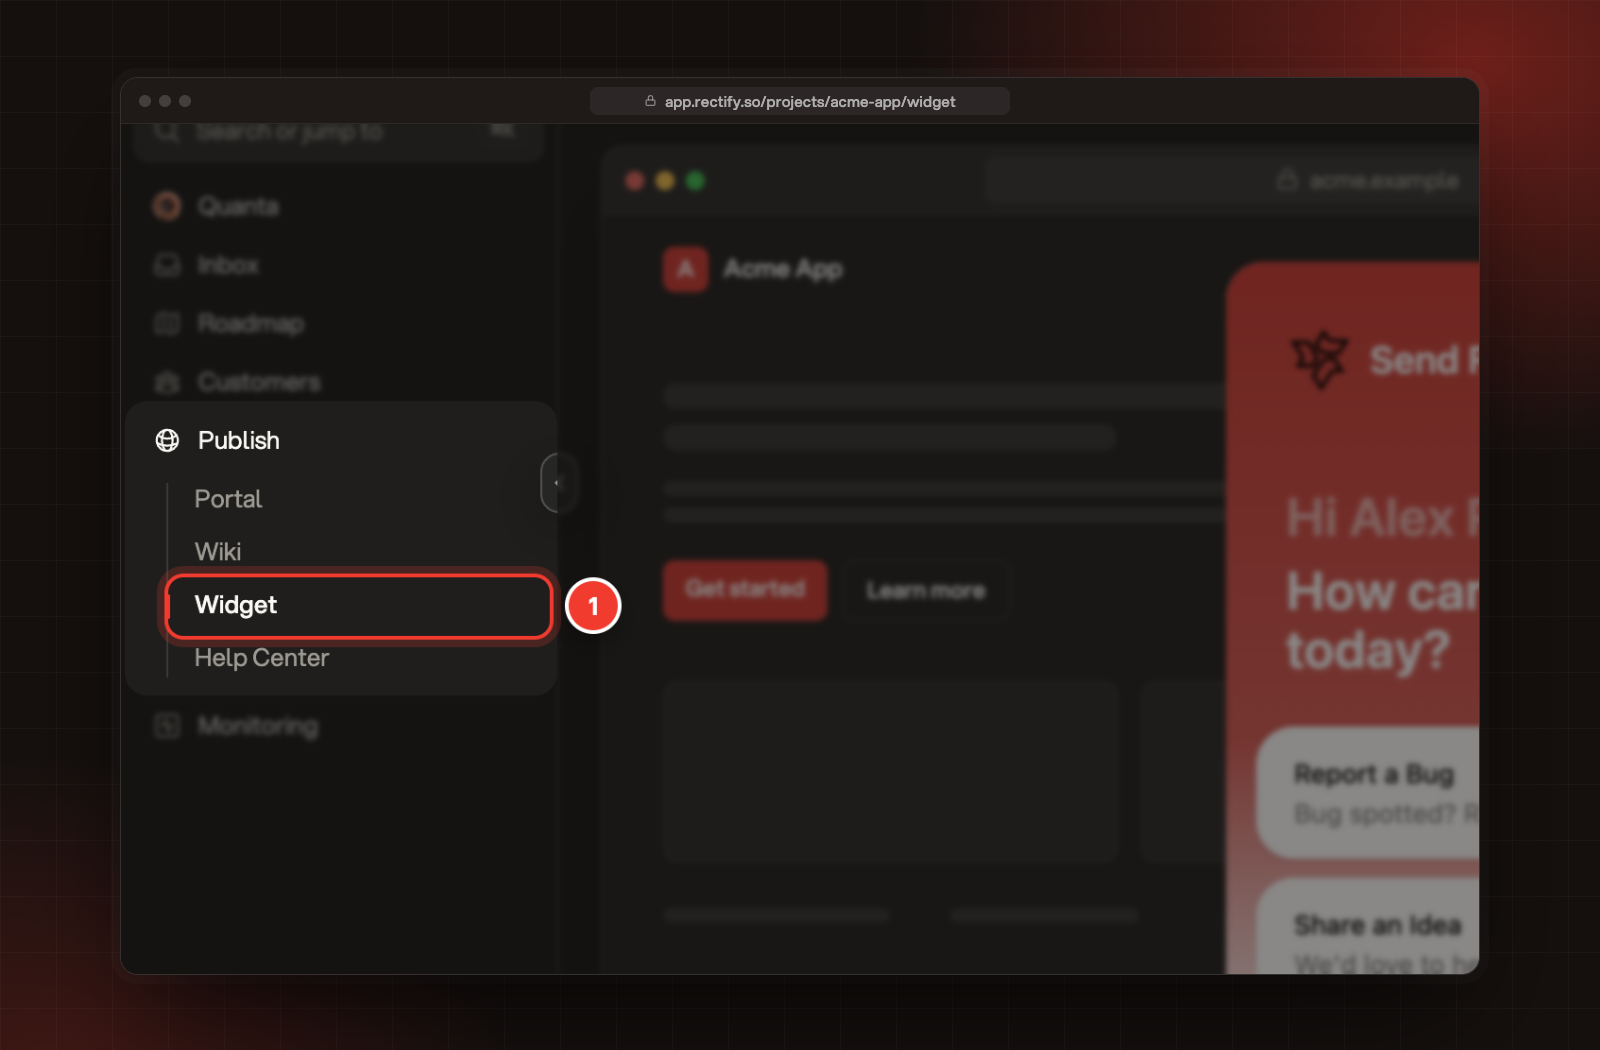
1.
In your project, open Publish, then Widget.
1 Widget, under Publish in the sidebar.
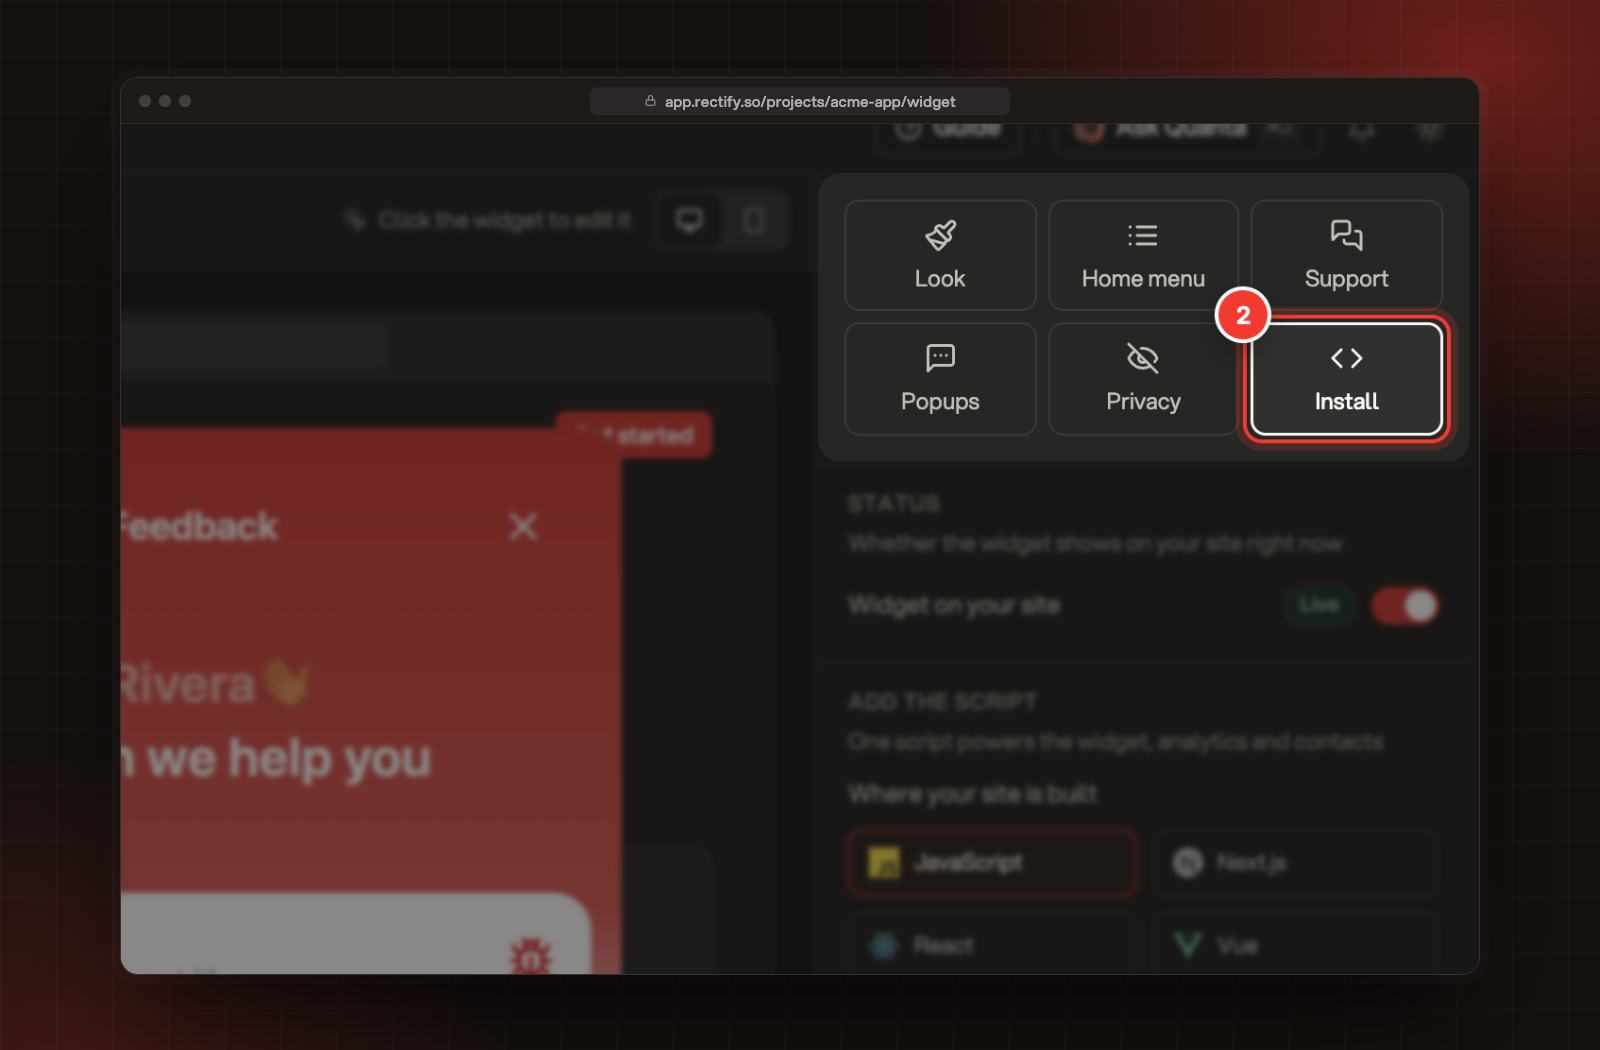
2.
On the right of the Widget page, select Install.
2 Install, on the right of the Widget page.
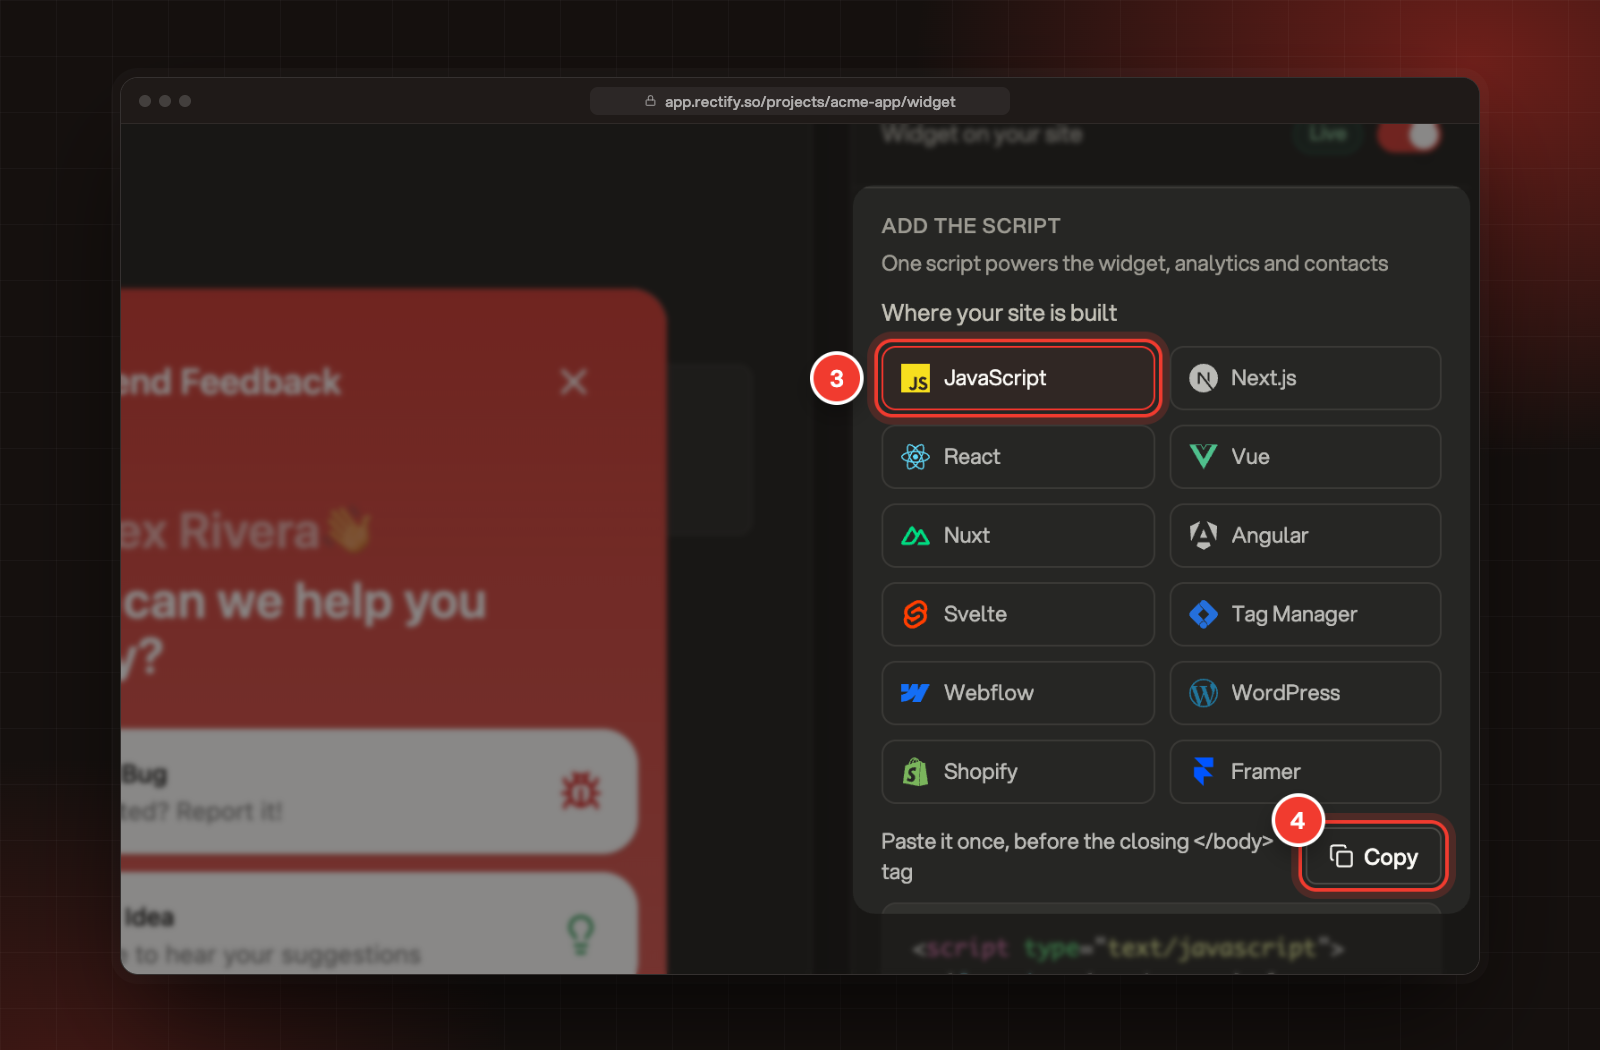
3.
Under Add the script, pick where your site is built. The line under the list tells you where the script goes.
4.
Select Copy.
3 Pick where your site is built. 4 Copy the script.
5.
Paste the script where that line says, then save and publish your site.
Copy the script from Rectify rather than from this article. The copy in Rectify already has your project ID filled in.
Where the script goes
The script is the same everywhere. Only where you paste it changes.
Where your site is builtWhere the script goes
JavaScriptPaste it once, before the closing </body> tag
Next.jsAdd it to app/layout.tsx so it loads on every page
ReactRun it once when the app mounts
VueRun it once in your root component
NuxtAdd it as a client plugin in plugins/rectify.client.ts
AngularRun it in your root component's ngOnInit
SvelteRun it once in your root layout
Tag ManagerCreate a Custom HTML tag, trigger All Pages, paste this
WebflowProject settings, Custom code, Footer code, then publish
WordPressTheme footer.php before </body>, or any header and footer plugin
ShopifyOnline store, Themes, Edit code, theme.liquid before </body>
FramerSite settings, General, Custom code, End of body tag
What the script looks like
Here is the script for each platform. Rectify fills in your own project ID where you see YOUR_PROJECT_ID.
<script type="text/javascript">
  (function (w, d, s, o) {
    var js = d.createElement(s);
    js.src = o.widgetSrc;
    js.async = true;
    js.onload = function () {
      if (typeof w.Rectify === 'function') {
        w.RectifyInstance = new w.Rectify();
        w.RectifyInstance.init(o.projectId, o.userInfo, o.config);
      }
    };
    d.head.appendChild(js);
  }(window, document, 'script', {
    widgetSrc: 'https://api.rectify.so/widget/widget.umd.js',    // Required
    projectId: 'YOUR_PROJECT_ID',     // Required
  }));
</script>
Check it worked
1.
Open your site in a new tab and refresh it. The widget's launcher appears on the page.
2.
In Rectify, Widget on your site at the top of Install shows Live. When it shows Paused, the widget is hidden everywhere, and you don't need to change your code.
If you're setting up a new project, the Install step in the setup ticks itself off the moment the script loads.
Other ways to install
When you set up a new project, the Install step offers two more ways in:
•
Let your AI do it: copy the prompt, paste it into your AI coding tool and deploy.
•
Send to a developer: email the script to the person who looks after your site.
Troubleshooting
The widget doesn't show on my site
•
Check that Widget on your site shows Live under Install.
•
Make sure the script is on every page. In a site builder, add it to the site-wide custom code, not to a single page.
•
If your site builder has a Publish button, publish again after you add the script.
•
Copy the script again from Install and paste it fresh, in case part of it was cut off.
Where do I find my project ID?
It's in the script you copy from Install, on the line that starts with projectId.
The Install section also shows how to identify signed-in visitors and how to open the widget from your own buttons.

Was this helpful?

Your feedback shapes what we write next.

Related articles