Write an update with a cover and labels, then publish it now or schedule it for your portal, widget and RSS feed.
6 min readUpdated 2 days ago
Before you start. Owners, Admins and Members can write, edit, schedule and publish posts. Only Owners and Admins can create labels, resend a post's email, or delete a post. The changelog is on every plan.
Write the post
1.
In the sidebar, open Roadmap, then Changelog.
2.
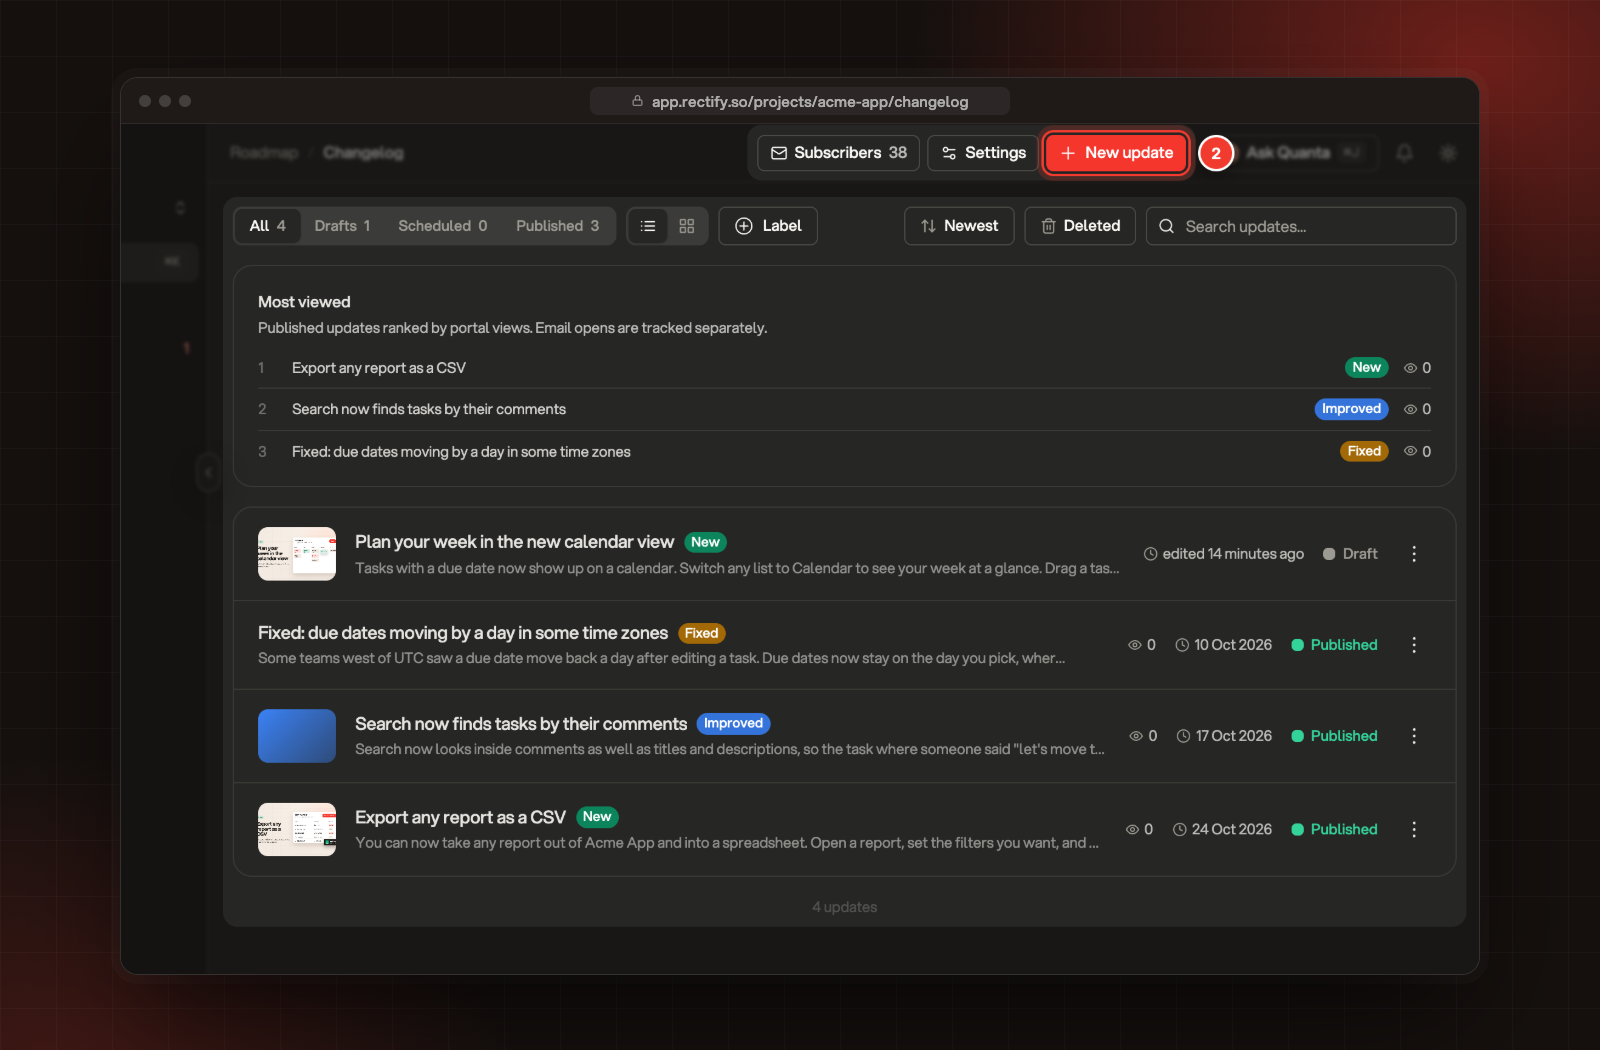
Select New update.
2 New update, at the top of the Changelog page.
3.
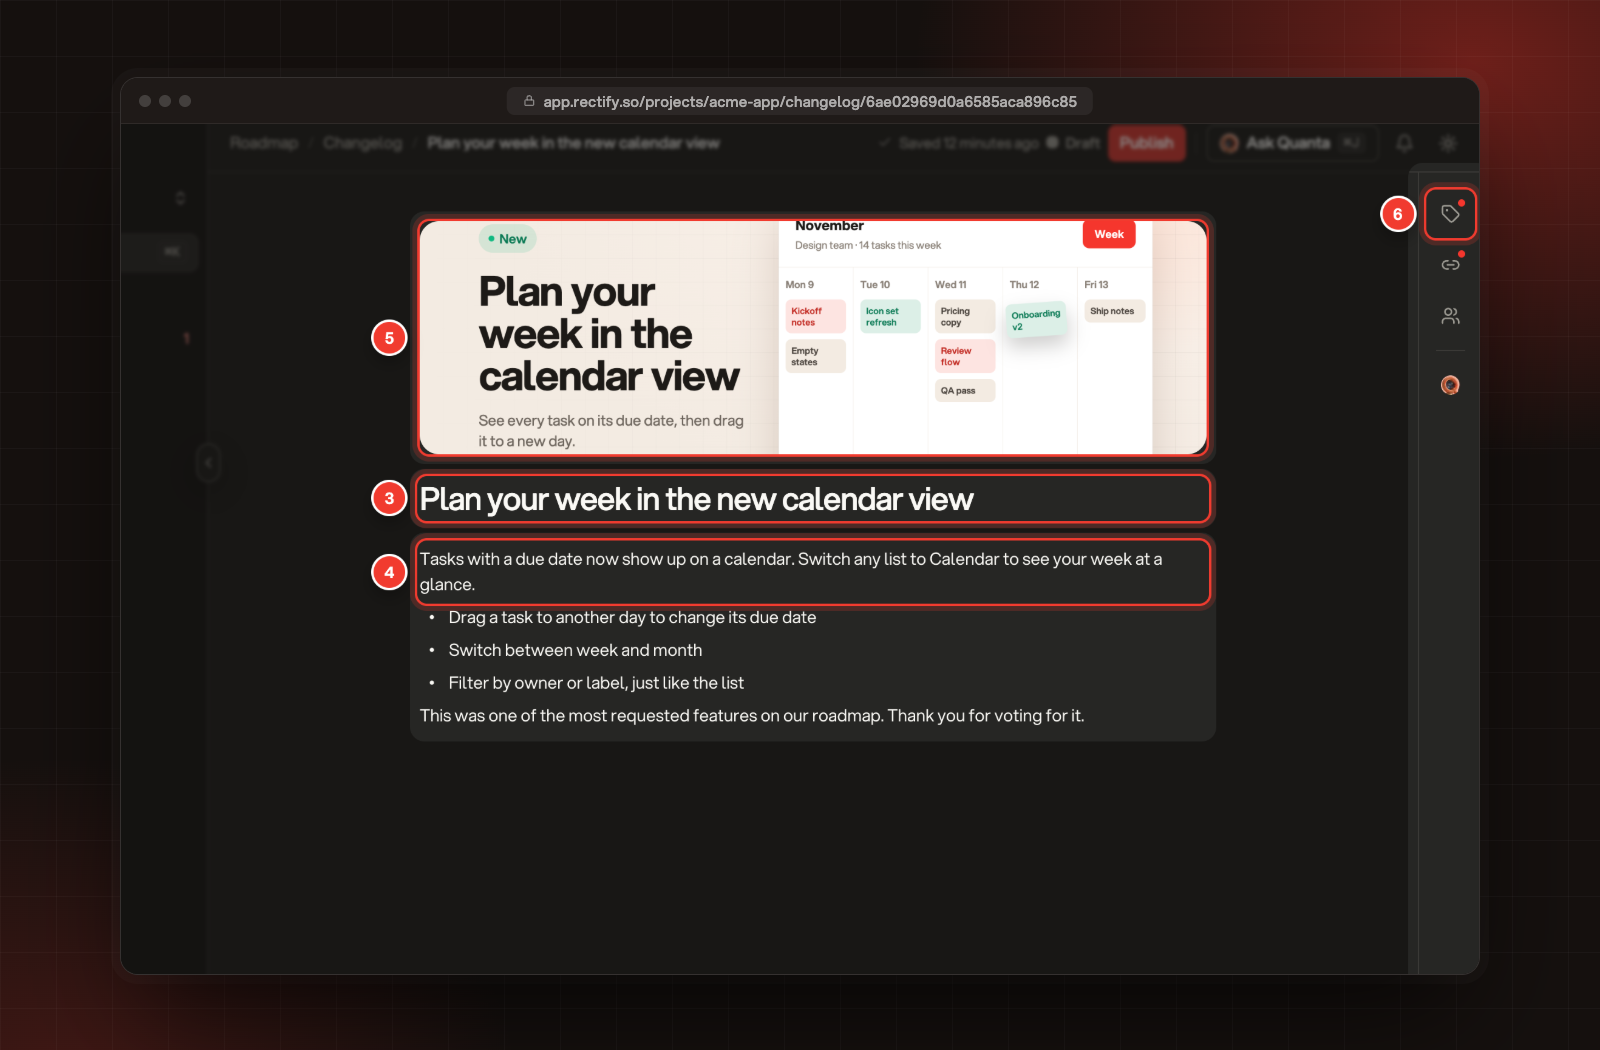
Type a title where it says What shipped?.
4.
Write the update below the title. Type / to add headings, lists, images, code, tables and more.
5.
To add a cover image, select Add cover above the title. You can upload an image, generate one with Quanta, or pick a colour.
6.
To add labels, select the label icon at the top of the right-hand rail and tick the labels that fit.
3 Title. 4 The update. 5 Cover. 6 Labels, in the right-hand rail.
Rectify saves as you type. The top bar shows Saving, then Saved, next to the post's status: Draft, Scheduled or Published. Nothing is saved until the post has a title.
Linked a few shipped requests already? Draft with Quanta, at the bottom of the rail, writes the title and body from them, or from a few lines you give it. It replaces what you've written so far.
Add a cover image
Covers are 16:9 and show above the post on your portal and when someone shares its link. Select Add cover, then:
•
Upload an image: pick a PNG or JPG. Drag to position it, use Zoom if you need to, then select Use cover. Rectify saves it at up to 1600 pixels wide, and the cropped file must be under 5 MB. For a sharp result, start from an image of 1600 x 900 pixels or more.
•
Generate with Quanta: paints a cover from your title and body. This needs a Gemini API key, which you add under Organization settings, AI providers.
•
Or a color: a plain colour band instead of an image.
Hover over a cover to replace it, regenerate it, view it full size or remove it.
Add labels
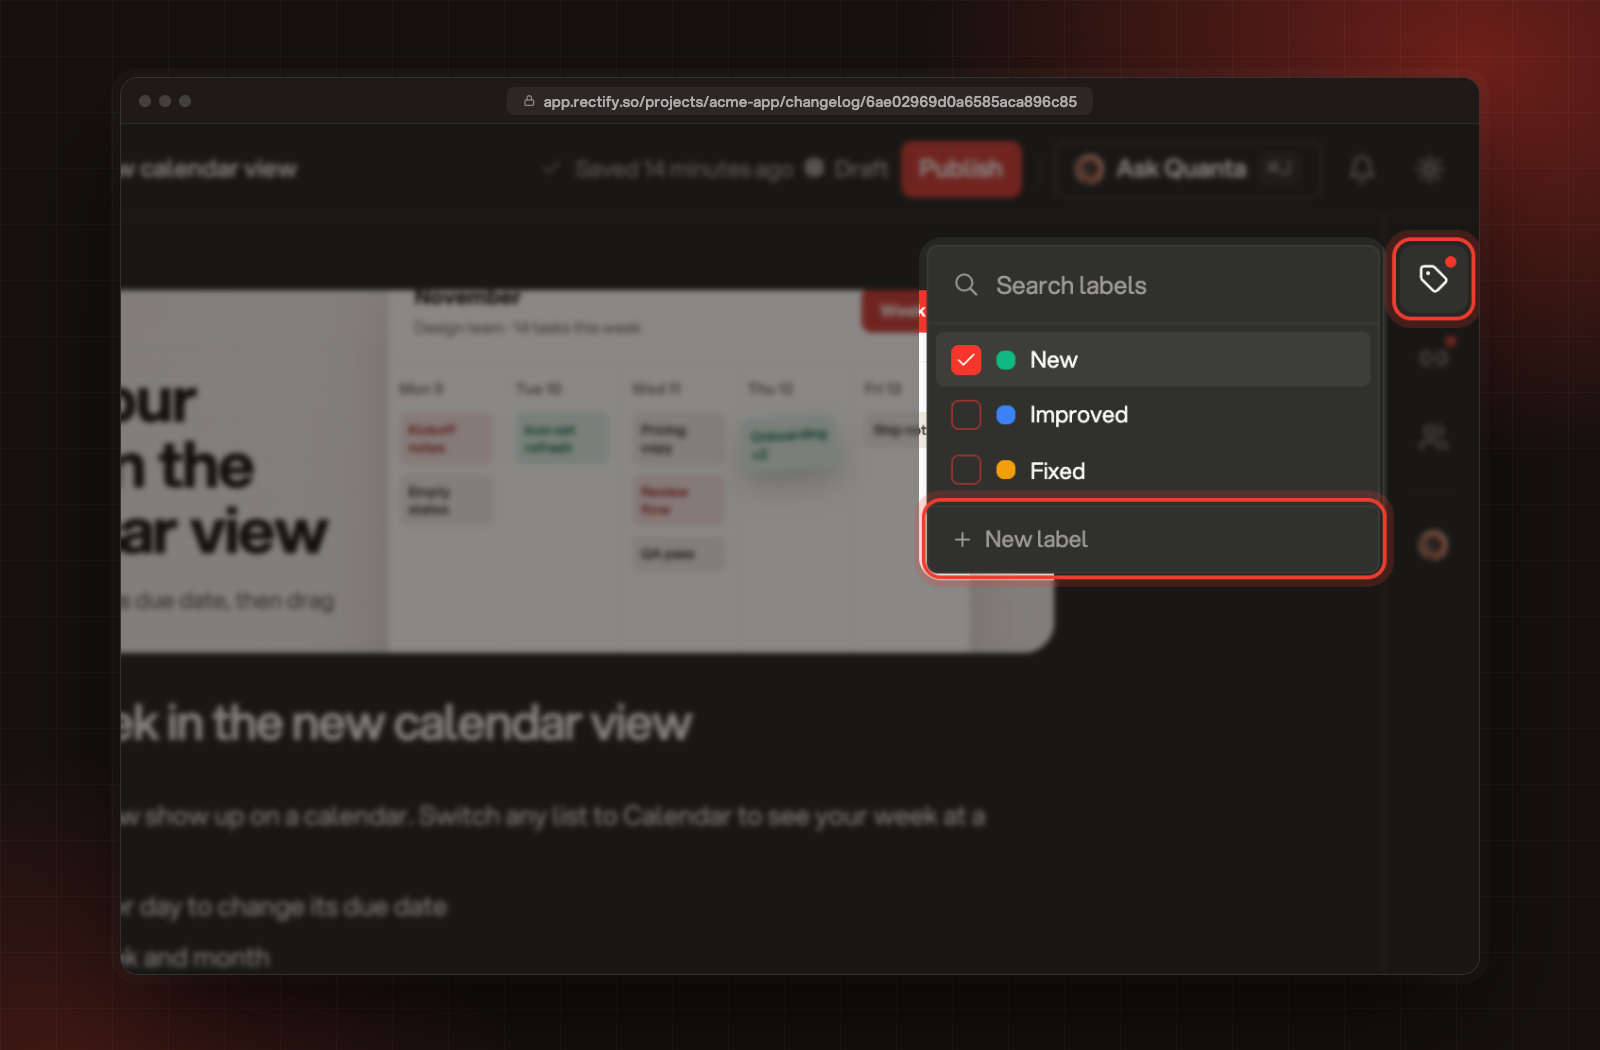
Labels such as New, Improved and Fixed tell readers what kind of change it is. On your portal, readers can filter the changelog by label.
The labels panel, with New label at the bottom.
A post can carry up to 10 labels. To make a new one, Owners and Admins select New label in the panel, enter a name, pick a colour and select Add label. The new label is added to the post straight away. To rename, reorder or delete labels, select Settings at the top of the Changelog page and open Labels.
Publish now or schedule it
1.
Select Publish in the top bar. It stays greyed out until the post has a title and some text.
2.
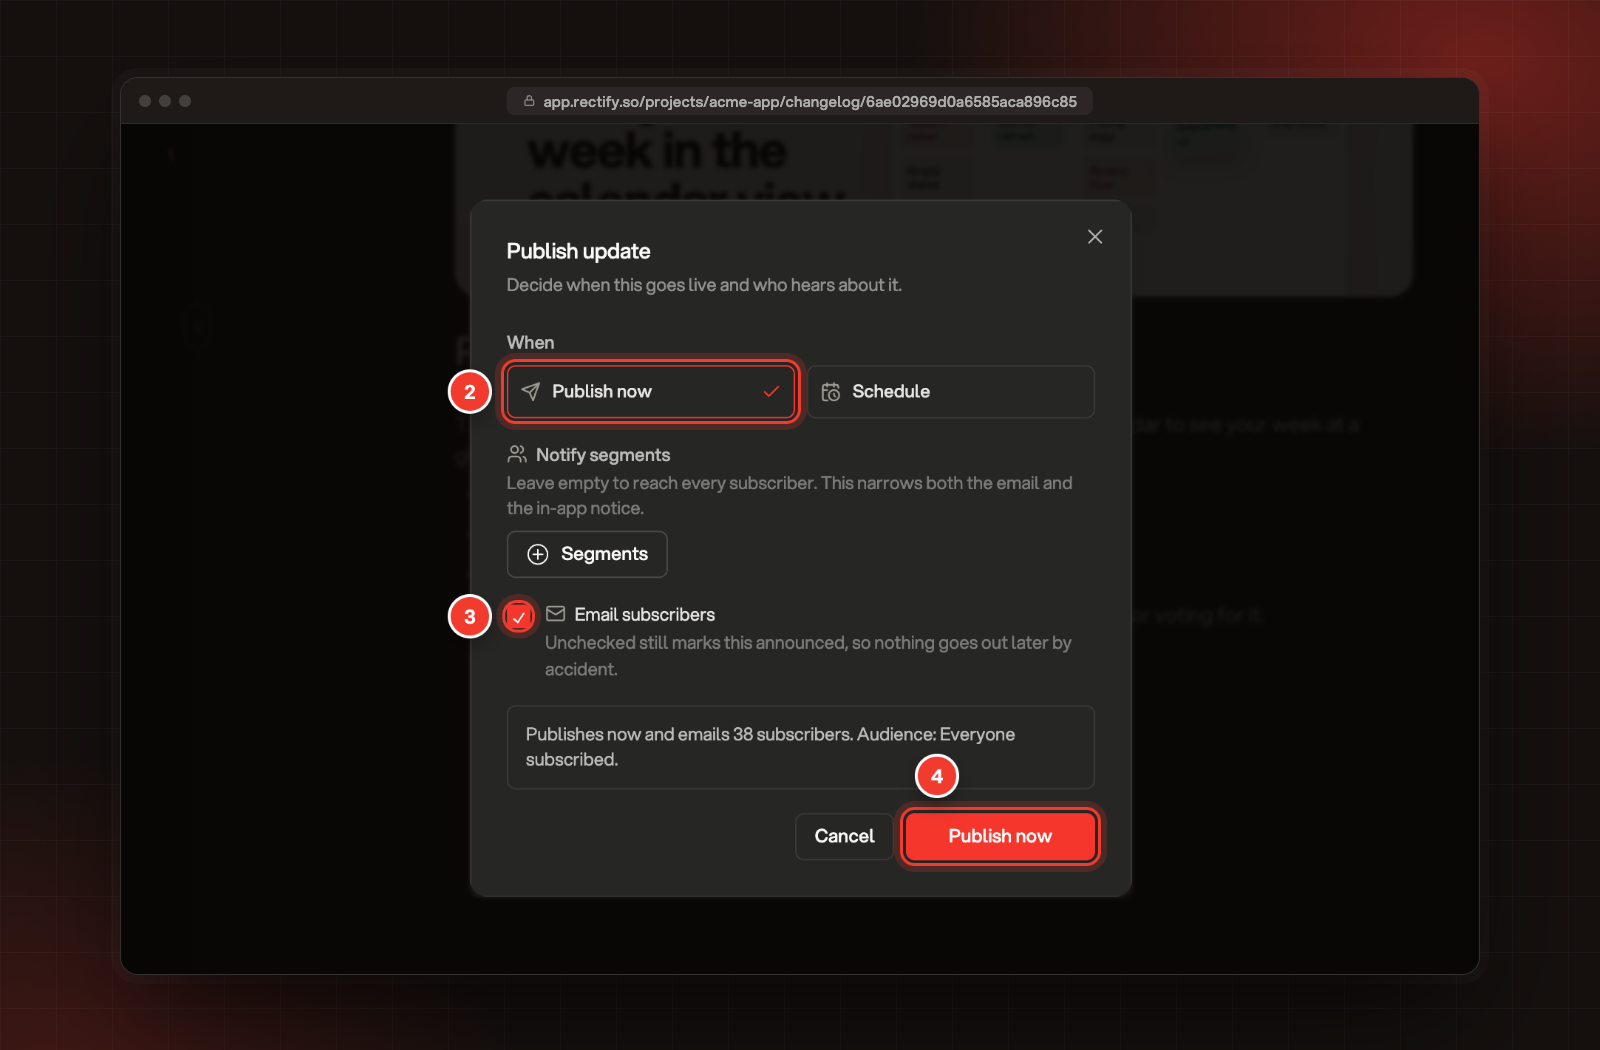
Under When, pick Publish now, or pick Schedule and choose the date and time it goes out.
3.
Tick Email subscribers to email the update, or untick it to publish quietly.
The line above the buttons sums up what will happen, for example "Publishes now and emails 38 subscribers." A post you publish quietly is marked as announced, so it never emails anyone later, and it isn't posted to Discord.
If your project has segments, Notify segments lets you pick some. Leave it empty to reach everyone. Picking segments does more than narrow the email: only people in those segments can see the post on your portal, in the widget and in the feed.
Your portal: the Changelog page, newest first, at app.rectify.so/your-portal-address/changelog. Each post also has its own page.
•
Your widget: the Changelog tab, when it's switched on. A dot on the tab tells visitors there's something new.
•
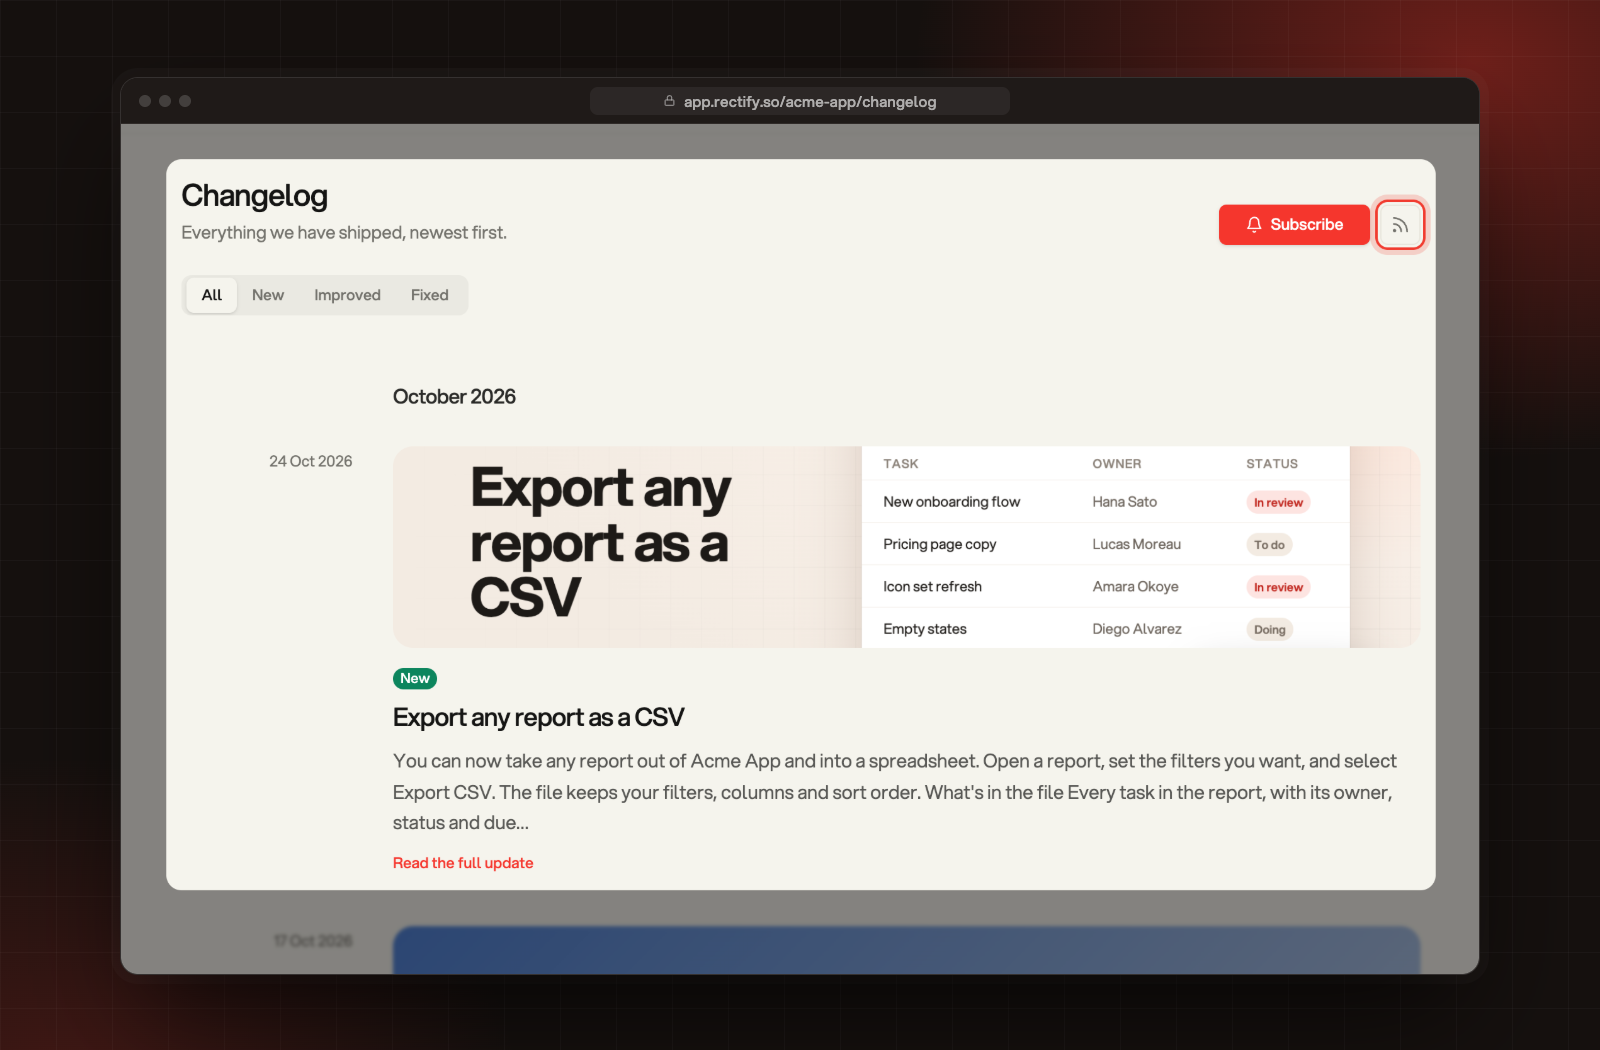
RSS: the feed icon next to Subscribe on the portal's Changelog page links to the feed, at /changelog/feed.xml after your portal address. It lists your 50 newest posts.
•
Discord: when your project is connected to Discord with a Changelog channel, Rectify posts the update there when it goes live. Posts published quietly or limited to segments aren't posted. Share roadmap and changelog updates in Discord shows what it looks like.
The portal's Changelog page, with the RSS feed icon.
Edit, unpublish or delete a post
•
Edit: open the post and change it. On a published post, your changes go live as soon as they're saved, and nobody is emailed again. A copy already posted to Discord is updated to match.
•
Change the date readers see: on a published post, select the calendar icon, Public date, in the rail and pick a date. It only changes the date on your changelog and sends no notifications.
•
Unpublish: on the Changelog page, open the post's menu and select Move back to draft. It comes off your portal, widget and feed. For a scheduled post, select Cancel schedule.
•
Duplicate: select Duplicate in the menu to start a new draft from a copy.
•
Delete: Owners and Admins select Delete in the menu. The post comes off your portal straight away. It stays under Deleted for 30 days, where you can Restore it, and is then removed for good.
Check it worked
Open the Published tab on the Changelog page to see the post with its date. Then select View portal on the Portal page under Publish, or open app.rectify.so/your-portal-address/changelog, and look for it at the top.
Publish is greyed out
Add a title and write something in the body first. Hover over the button to see what's missing.
It says "Pick an image file" or "Keep covers under 5MB"
Covers must be images. If the cropped cover is over 5 MB, save the image as a JPG, or make it smaller, and upload it again.
My post isn't on the portal
Check its status. A Scheduled post appears at its scheduled time, and a Draft doesn't appear at all. If you picked segments, only people in them can see it. If the changelog is set to signed-in readers, visitors must sign in first.
Generate with Quanta asks for a Gemini key
Cover images are painted with Gemini. Add a Gemini key under Organization settings, AI providers, or upload your own image instead.